Before + After | How to use Photoshop to Polish Your Images
Anyone can take an amazing photo with the “right” camera, RIGHT?? Yeah, I use to believe that too 😉 As someone who is still fresh in the industry, I’m constantly working on polishing my work and fine tuning my technical skills. This brings me to today’s blog post about editing.
Sometimes I wish I could take pictures in a beautiful, rich, colorful garden. One with dark, lush trees, bushes and rich, colorful flowers. And, perhaps a wooden bridge and waterfall. The problem is that I don’t live near anything like that. And that’s okay! Most of the locations that I shoot in aren’t even close to that. It’s in situations like these that force you to get creative. How can you utilize your location to its maximum potential? Are there any hidden gems there? What lens should you use in order to minimize distracting elements? All of these things should cross your mind before you even pick up your camera.
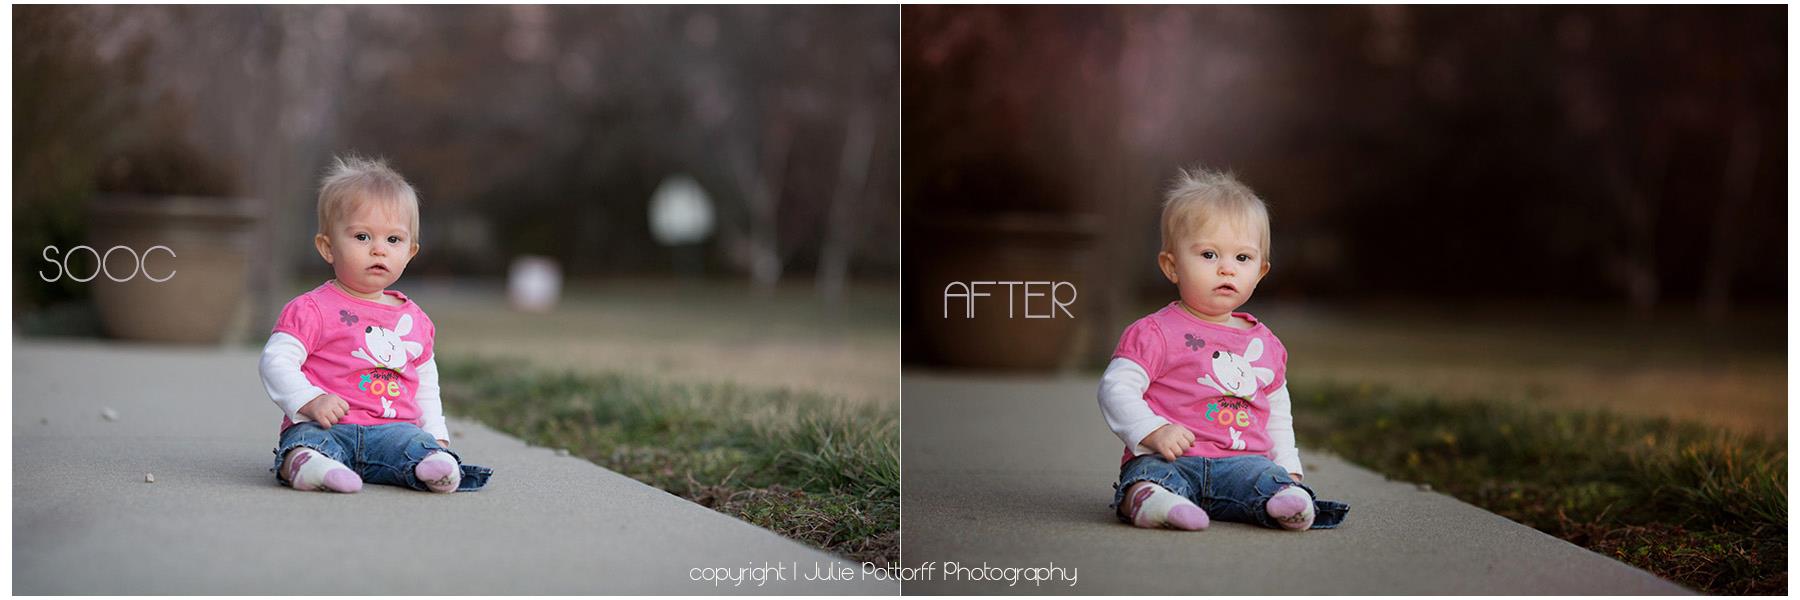
In the photo below, I wanted a rich, colorful picture, in which my daughter was the subject. You can see that my SOOC (straight out of camera) shot had some distractions in it. There was a couple of signs and some stray rocks on the sidewalk. After I got rid of those, it was time to work on the background. After playing with the color adjustment layers available in Photoshop I was able to manipulate it and have it look like the way I envisioned it. I also cropped in a little closer, to make it more visually pleasing to the eye.
So you see, while it’s important to get a good image SOOC (white balance, exposure, composition), you can use the magic of Photoshop to further polish and perfect your vision 🙂